In this tutorial, we will learn how to run an N8N workflow using GitHub Actions. N8N is a powerful workflow automation tool that allows you to connect various services and automate tasks.
Prerequisites
Before we begin, ensure you have the following:
- A GitHub account with a repository where you want to set up the action
- Basic knowledge of GitHub Actions and N8N workflows
- A workflow created in N8N that you want to run
How are we going to do it?
A N8N workflow can be triggered using multiple ways, such as Webhooks, Chat Trigger, and Manual execution from the UI. But for all this, you need a running N8N instance. But in this tutorial, we will use the N8N CLI to run the workflow directly on the GitHub Actions runner, without needing a running N8N instance.
Important Steps
- Modify Workflow Inputs:
You must have tested your workflow in your local instance or in the cloud, using either a manual trigger or a webhook. If your workflow depends on inputs from the trigger, you need to modify it, as the N8N CLI does not support passing inputs directly to trigger nodes.
How do you go about doing this?
In my case, my N8n workflow needed two inputs, versionNumber and componentName, to run successfully. Because I cannot pass these values via command-line flags, I modified my workflow to read a JSON file from the local file system using the “Read File” node, then parse the JSON using the “Set” node to extract the required values.
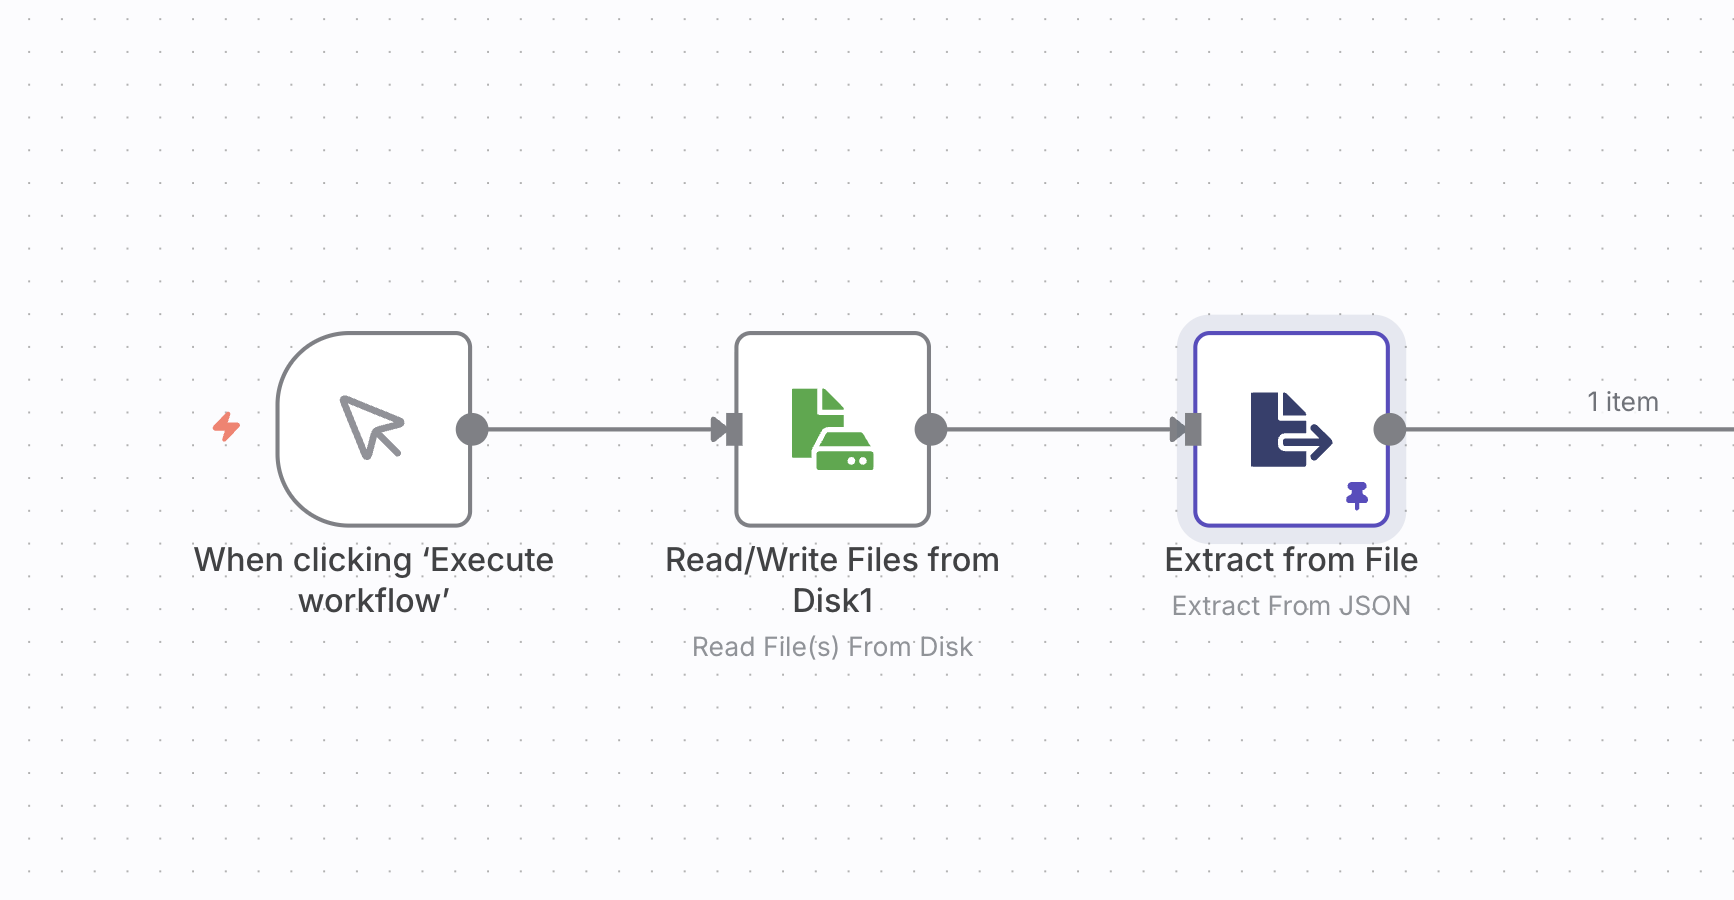
So, I triggered my GitHub action manually using the UI and passed the required inputs. The action converted these inputs to a JSON file and saved it in the local file system. The N8N workflow then read this file and extracted the required values.

- Modify Workflow Outputs:
Since the N8N CLI runs the workflow in a non-interactive environment, you need to ensure that the workflow’s outputs are handled appropriately. You can use nodes like “Write Binary File” or “HTTP Request” to send the output data to a desired location or service.
In my case, I used the “Write File” node to write the output to a file in the local file system. This way, I could easily access the output after the workflow execution. I used another step in the GitHub Action to read the output file and display the results in the action logs.
My workflow generates a file named result.md that contains the results of the workflow execution. In the GitHub Action, I added a step to read this file and print its contents to the action logs.
- Importing N8N Workflow to GitHub Action:
After testing your workflow on the cloud or on a local instance, you need to export your N8N workflow and credentials so that they can be used in GitHub Actions. You can do this by using the n8n CLI.
The important thing is that credentials are encrypted using the n8n encryption key. So you need to be aware of the value of the env variable N8N_ENCRYPTION_KEY in your local or cloud instance and set the same value in the GitHub Action environment variables. So when we run this workflow in the N8N instance, the imported workflow and credentials will be decrypted successfully.
n8n export:workflows --all --output=workflows.json
n8n export:credentials --all --output=credentials.json
Store these files safely, as we will need to import them into the GitHub Action.
- Getting the Workflow ID:
We need a Workflow ID to run the workflow using N8N CLI.
To get the workflow ID, you can use the n8n CLI to list all workflows and find the ID of the one you want to run. You can do this by running the following command:
n8n list:workflow
This will display a list of all workflows along with their IDs. Note down the ID of the workflow you want to run in the GitHub Action.
Or go to the N8N UI and open the workflow you want to run. The workflow ID will be displayed in the URL as follows:
https://<your-n8n-instance>/workflow/<YOUR_WORKFLOW_ID>
Copy the <YOUR_WORKFLOW_ID> from the URL.
Now we are ready to create the GitHub Action workflow.
Instructions
Create a new GitHub Action workflow file in your repository (e.g.,
.github/workflows/n8n.yml).Create a “data” directory in your repository to store the workflow and credentials files.
Store your “credentials.json” and “workflows.json” files in the “data” directory.
Set
N8N_ENCRYPTION_KEYas a secret in your GitHub repository settings. This key should match the encryption key used in your N8N instance.Create a
run.shfile in your repository with the following content:
#!/bin/sh
n8n import:credentials --input /data/credentials.json
n8n import:workflow --input /data/workflows.json
n8n execute --id <YOUR_WORKFLOW_ID>
Replace <YOUR_WORKFLOW_ID> with the ID of the workflow you want to run.
- Add the following content to the workflow file:
name: Run n8n Workflow

permissions:
  contents: write

on:
  workflow_dispatch:
    inputs:
      component_version:
        description: 'Component version ID'
        required: true
        type: string
      component_name:
        description: 'Component name (e.g gateway etc..)'
        required: true
        type: string
      component_version_number:
        description: 'Component version (e.g v5.8.5 etc.)'
        required: false
        type: string

run-name: "Workflow for ${{ github.event.inputs.component_name }} ${{ github.event.inputs.component_version_number }}"

jobs:
  run-n8n:
    runs-on: ubuntu-latest

    env:
      N8N_ENCRYPTION_KEY: ${{ secrets.N8N_ENCRYPTION_KEY }}

    steps:
      - name: Checkout Repository
        uses: actions/checkout@v3

      - name: Create input.json
        run: |
          mkdir -p n8n-data
          echo '[{ "version": "${{ github.event.inputs.component_version }}" }]' > n8n-data/input.json

      - name: Set write permissions for n8n-data
        run: chmod -R 777 n8n-data

      - name: Run n8n container
        run: |
          docker run --rm \
            --name n8n \
            --entrypoint /data/run.sh \
            -e N8N_ENCRYPTION_KEY="${N8N_ENCRYPTION_KEY}" \
            -v ${{ github.workspace }}/n8n-data:/data \
            docker.n8n.io/n8nio/n8n

      - name: Show result output
        run: |
          echo "---- result.md ----"
          cat n8n-data/result.md || echo "result.md not found"
Commit and push the changes to your repository.
This GitHub Action has to be triggered manually from the Actions tab in your repository. You can provide the required inputs when triggering the action.
Conclusion
By following these steps, you can successfully run an N8N workflow using GitHub Actions.
That’s it for this blog post. If you liked this post, you can subscribe to my newsletter to stay updated. You can also check out my YouTube channel, where I discuss DevOps, Cloud, Kubernetes, and AI.
If you have any questions, you can reach me on Twitter at @SharadRegoti